Wednesday, August 10, 2011

Making progress- Finishing projects

I'M DONE! Yes, I finished the apron, completely. I gave it a wash and dry and noticed that the flannel fabric enlarged itself. How does it get bigger instead of smaller? Oh well, I'm not going to fuss over it. I know my sewing skills stink but my defense is lack of consistent sewing over the years. I've had my sewing machine for about 15yrs and I've probably used it the equivalent of 1yr or less of consistant sewing. Shame on me, letting my sewing machine sit and be neglected which is probably why it doesn't want to sew a straight line. I really need to take my lovely in and have a tuneup.

So I finished the apron and here it is. close up of adjustable neck strap and the pockets in place. WOO! 1 project down a gazillion to go.


I started sewing on my sewing machine cover last night. I already had the pieces somewhat cut out. I made the rough pattern on graph paper then cut the pattern out from freezer paper. I then ironed the freezer paper to one side of my fabric sandwich and used it as a sewing guidline. I used a quilted fabric and a 2009 Brother Sister design studio fabric called Swirly floral or something like that. I probably should have used a stiff stabilizer to have it stand up better but I don't care, I like it just the way it is though I thought about sewing in a few cuts of lightweight boning to help it stand better. The floral fabric was a clearance fabric and I only found one person that had it when searching for some more of it. I love this fabric and I am by no means a very "FLORAL OR RETRO" person. I look at this fabric and it makes me happy, just like my sewing machine. I expect to have this finished tonight or no later than thursday. After I finish this project i'm gonna start on the kitty bed for my brood.

WIP/Sewing machine cover


I also played around, well i'm still dabbling with it, making a fabric embellished ATC (artist traiding card) with some of the scraps from the floral fabric. I want to make a bigger wall hanging of it for my sewing area but I only have a little bit left, maybe a 1/2 yard give or take some inches. I didn't get a picture of the card, not done yet.

Tuesday, August 2, 2011

Slow Progress

Not sure what to write other than I HATE MY DEPRESSION! I hate the stress that occurs daily in my life and spend hours daydreaming about a vacation away from my husband and teenage daughter and sometimes the cats are also included in that daydream. Honestly, I prefer my kitties to my family right now.

I have not finished that apron. I had planned on finishing this 2 weekends ago, well it didn't happen and last weekend, same thing. I had plenty of time, just no mojo. Sigh, I think what has made it bad is that something just wasn't feeling right and made things just seem so off. I did get the pockets finished and they are ready to be sewn on. I also finished the straps and attached them as well as the ruffle. When I got ready to put the pockets on, that's when it really hit me that something just wasn't right. Somehow, and this probably happened because at the time I cut this out, freehand, I was using the carpeted floor as my table. I did not cut identical sides, one of the sides was about 3/4 inches off. I found this out when I finally folded it, after all that work too. I was just gonna forget about it and not bother to try and fix it but the more I looked at the more it said FIX ME! So I ripped out the edging in the area that need to be cut down and trimmed to match the other side, marked the new sewing line and that's as far as I've gotten. I think I may sit down tonight and get this done, might take me a whole 30 min to an hour to make the change sew it, reattach the edging and maybe change the strap so that's adjustable instead of one size fits all. Crossing fingers.

I was going to post a picture of the pockets by themself but it seems I haven't downloaded them and they are not on my camera, I must have accidentally deleted them, crap. I do have a couple of pics that kinda show the pockets.

This is my kitty Guinness, he loves getting up on my sewing table and hanging out when I get up to get something. Here he is holding down the apron when I was attaching the ruffle.


This is him holding down my handmade seem presser and in this pic you can see one of the pockets are done minus the strawberry button.


Here's his close up. He's spoiled rotten.


This photo shows the apron all sewn up except for the pockets. The pockets have their strawberry buttons attached and I was trying to place them. I'm sure you can see what I mean by the "OFFness" I was talking about in this pic.


Here is a little throw pillow that i've been meaning to make for a sometime now. I've had the pillow and the material but just didn't get around to it until about 2 weeks ago, just before all my mojo ran out the door and left me hanging with unfinished work. I've had this material for years, probably since the late 90's. It's a heavy knit and I still have probably about 4yds of it left, I think I bought like 5yds of it when I got it and it's 60 inches wide.
Front:

Back:


So this has been the extent of my creativity the last few weeks. I hang my head in shame because the ideas don't stop just my mojo. I have noticed that when I do manage to blog and complain that I haven't finished something it helps just a bit to tweek me some to get something done as long as it's not to complex. Complexity lately melts my brain into mush.

Thursday, July 21, 2011

Strawberries

My grandmother has a love for strawberries. Her kitchen theme is strawberries. I was asked a few years ago to make a strawberry apron with a protective layer to keep water from soaking through and getting on your clothes. Okay, no problem, atleast that is what I thought. It is not easy finding strawberry fabric. I finally found some in a flannel. I have all my materials handy and even purchase some strawberry buttons from Etsy and Hobby Lobby to decorate with on the pockets and straps or whereever.

I go through my stash of fabrics and find a nice mauve gingham to use as a backing and I even had a bit of red cotton fabric. I use the red to accent the strawberry flannel fabric in the ruffle and decide the gingham would look good too. I'm almost done. Here are some pictures. The only thing left to do is, sew on the ruffle and the straps, make the pocket and sew it on, add buttons and give it a wash and done.


see the pocket pattern


ruffle:


buttons:


I'm pretty close to finishing this. It shouldn't have taken me almost 2yrs to do this but depression has been a horrible roommate. While working on this, despite the flaws I know it has, I like it and I think I just might make me something like it for my own kitchen.

Here are a few more pics showing my furry helper while I was pinning the ruffle on. My furry helper is our rescue kitty Gwen. She's such a sweetie and always looks like she's smiling.


Not a lot Lately

I thought I was getting back into creating but the last few weeks have been very iffy even after I cleaned up my space and made a little bit more room. I really don't have that much space to work with or quiet either whenever the hubs is at home. I try very hard to make what I have work, yet I still find myself wishing for that extra room that I can call my own, ALLLLLLL MINE!

In order to cut out fabric and have a symblance of a table this is what I have to do. Take 6 TV tray tables of all the same height, if they aren't find books or so forth to make the smaller tables as tall as the others. In the pics I only have 5 cause the 6th one had stuff all over it and I didn't feel like moving the stuff. I use masking tape to tape down the corners of the cutting cardboard mat to the tv tables to keep it steady and not moving as I work. Also liberally dot area with curious kitties. The last thing is a must, kitties.


I also finally got around to make a duct tape dummy, FINALLY, I hate it. I'm gonna save up my money and get me a dress form but so far, can't seem to find any that size up to my measurements. What a horrible wake up call. :(


Here is a top I made that didn't come out right because I didn't double check the knit fabric before cutting. The stretch is going up and down instead of side to side. It works as a sleep shirt and a bathingsuit cover up. So I guess it wasn't a total loss. I guess next time i'll follow the directions better too. I found the instructions on Burda Style in the free patterns section. I was also trying to use fabric I had on hand.

Monday, May 23, 2011

Just a little Something

I got inspiration for this bracelet from a girl at Joann Fabrics. Her bracelet was actually 2 pieces of lace overlapping to make her fabric cuff. It was very pretty. I found some inexpensive pleated ribbon with velvet ribbon running the center of it. Perfect for making small wristlettes. The velvet ribbon makes a nice smooth surface for embellishing and finished off with a simple sew on snap and voila, a lovely little bracelet.

I didn't buy a lot of the ribbon trim I made this wristlette from but I could easily make more by pleating appropriate sized satin ribbon and adding velvet ribbon or something other than velvet for the center. I do need to find a better adhesive than the Aileene's jewel it stuff.

So here is my 1st one, the prototype. I'm makine a matching pair with a necklace next. I just haven't decided on what color I want to do the set. I want the color scheme to be universal in day and evening wear as well as matching to a myrid of outfits.


Thursday, April 21, 2011

Time Flies

Wow, didn't realize it has been awhile since I posted anything, okay yes I did but not as long as it actually has been. What have I been up to, existing. Yep, just existing. So far this year hasn't turned out to be near the hopes and dreams I had back in January. The creative ideas are there, just not the drive. I really wish this funk would go away, it's been hanging around to long. I have dabbled here and there on stuff. Nothing all that significant, wish I could say otherwise. I'm trying to get a duct tape dummy form done but can't seem to find a willing person to help me. Daughter says it's weird and hubby doesn't want to listen that it needs to be done a certain way not just taking tape and wrapping in a circle, UGH!

1st- Harem Pants. The ones I had been working on, finished, then promptly tore them up and threw them away. The fabric was thread bare and they were just for practicing on. I removed the elastic from the mock up to reuse in the real ones. The waistband on these is made from the runner on the bottom inside of the sari. I did do a bit of color dying trying to match it to a skirt color, eh. I got the sari fabric and figured out somewhat of how I wanted the fabric to be and snippy snippy I went. They didn't turn out exactly as I had envisioned by fairly close. I realize my biggest issue with pants of any sort is the rise factor in cutting the crotch area. Practice, practice, that's all I really need.


2nd- Dyed Pearls. That was some fun experimenting. I went on to make other colors, like silver/grey and black. I tried to make a bahama blue but it came out more like the faintest of blue instead and I left them in a long time. They just didn't want to hold the color. I also made a few things from the pearls I dyed and have ideas for some of the other pearls.

Pink Dyed pearls and pink swarovski 4mm bicone crystals and delica beads.


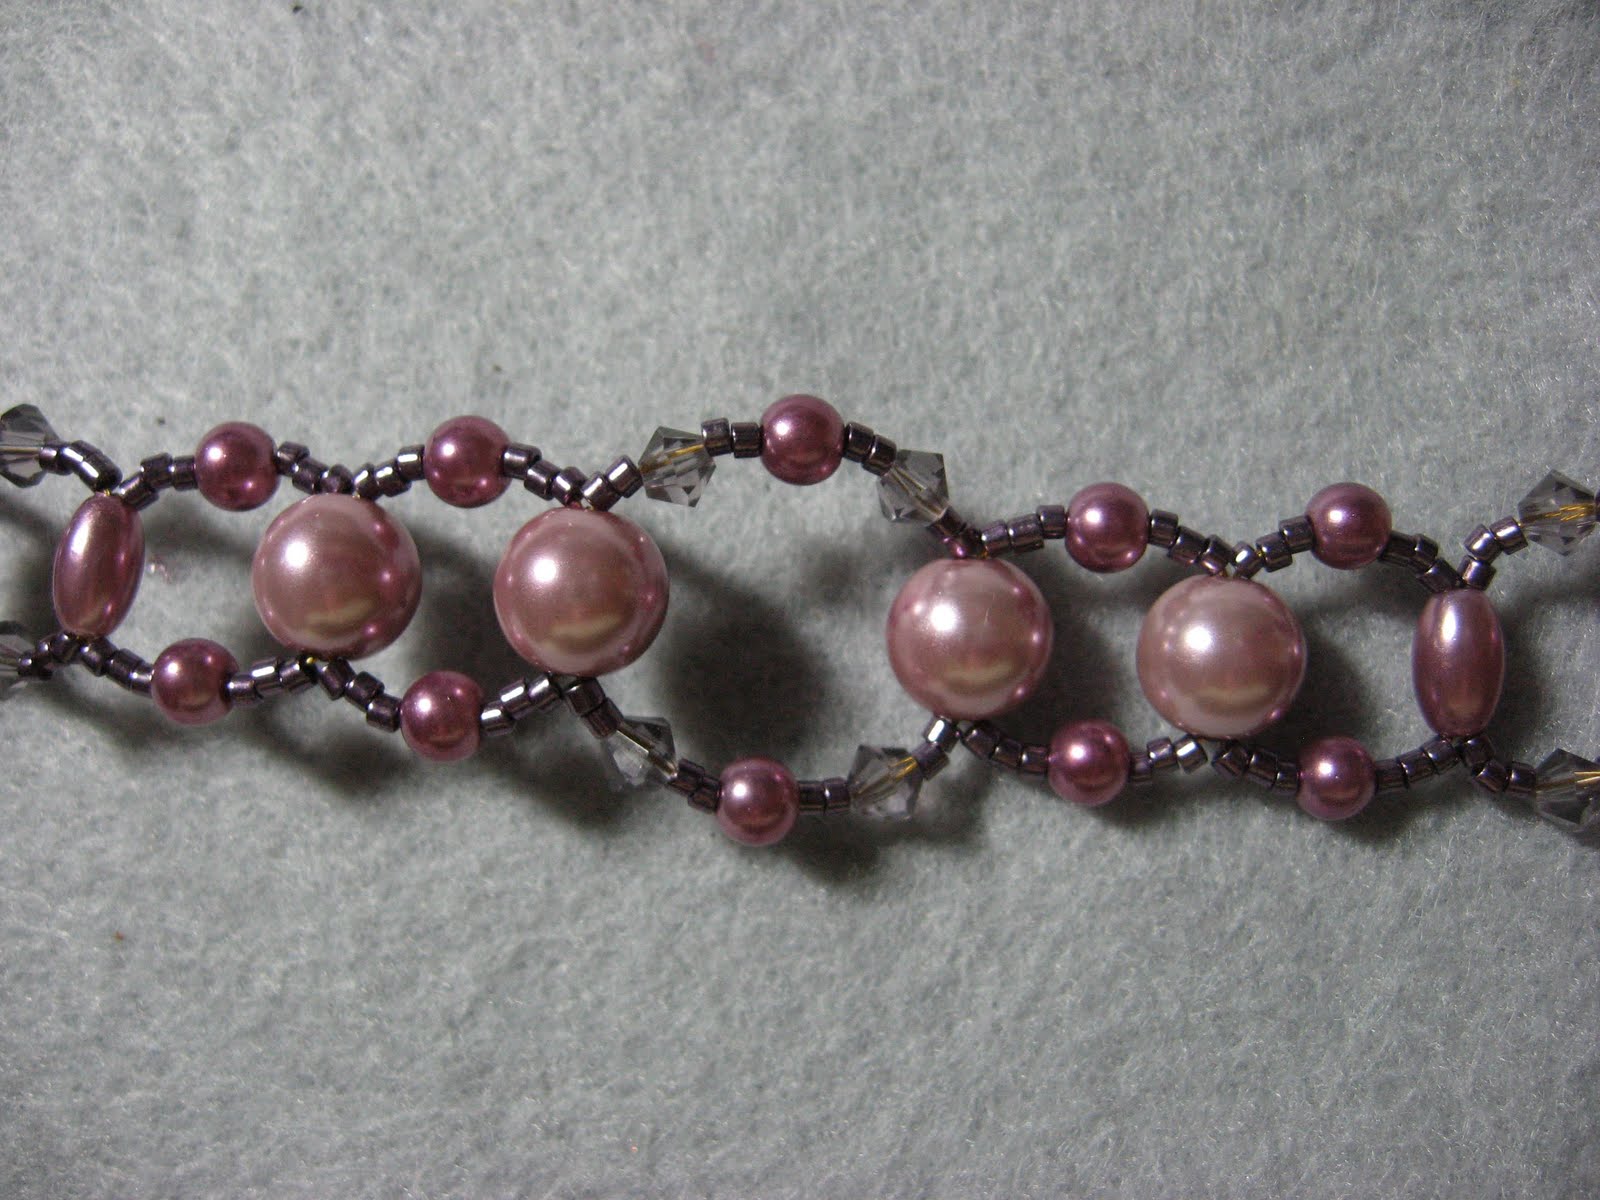
Close up of Pink Dyed Bracelet/earrings


Purple dyed bracelet


I also made this green bracelet but I bought the pearls this color. Pearls and 2 different sized/color swarovski's and delica seed beads.


I finally put the finishing touches on this hair fascinator.. added a few flowers and a clip.


I also made a skirt using some of the left over from the sari harem pants along with another found odd fabric apparel. I think the main body of the skirt was a head type covering that india and muslims wear. I still need to make the matching arm decor to go with it. It ties in prettily with the harem pants. Once I finish those, then I need to make a top and i'll have a full matching outfit. YEAH!. The skirt is a deep burgandy, chiffon maybe. It flows but it's kinda heavy as well. I should probably get a pic of this. It has a spot on it that looks like paint that I can't get out but it's at the bottom. I thought about doing some beadwork or something to cover it up. UPDATED: Got a pic of skirt.


Lets see I made this ring earlier this month. I'm still a bit iffy on it though. I was trying to use materials I already had without buying more. I have way to much already.


Other than those, not much else. I've been trying to get into sewing but I just don't seem to have the room and without a dress form, be it store bought or handmade, it's really hindering me at the moment. A lot of the things I want to make, I can't because I don't have an extra hand/helper that knows what to do. The teenlette is more interested in satisfaction right now instead of makeing an effort for the long term goal. I do think she is becoming a bit more interested with Faire season here and we now have one that is really close to us.

Friday, January 7, 2011

HAPPY NEW YEAR AND NEW IDEAS!

It's a new year and i'm hoping this one will be filled with more creative persuits than last year or the years before. Crossing fingers that I can make that happen. I'm trying, might take me a little bit to get going but I think this year will be good.

Here are some pics of the gifts I made for family and friends for Christmas. I call these Scoodies (scarf with a hood). I looked them up on the internet and they are really a very basic pattern. I did modify it a little bit in the back behind the neck so that there wouldn't be a lot of bunching up. So far so good.

My scoodie: Black fleece with faux animal print trim on hood.


This is the one I had originally made for my grandmother but ended up giving it to my Uncle's girlfriend after my grandmother said she couldn't stand things on her head because it would mess up her hair when she saw me wearing mine. Glad I was able to change it out before I gave it to her and it never got used. It's made from fleece. I had just a plain black bias tape on the hood edge but it really felt like it needed a bit extra so I added the black lace. I also added small black looped fringe to the ends.


I made this one for my mom. It's just like the pink one except it doesn't have the bias tape edge, just lace.


Just recently I came across a tutorial on dying glass pearls over on Martha Stewart and just had to try it out.

I'm still on the fence with this one. Yellow and Tan seem to take better to the pearls than the other colors I tried, black, wine, dark green. Here are some pics of the results.

1st experiment:

2nd experiment


Other than those things, nothing new. Hopefully I will have new things to show more often this year instead of once every few months.