Showing posts with label finished. Show all posts

Monday, August 22, 2011

I FINISHED!

Over the weekend, I finished the sewing machine cover and I made a pattern from a shirt I have and I'm tweeking it for other ideas. I bought more fabric over the weekend to make shirts from my new pattern. I picked up this silky animal print material that I'm going to make pillow cases with a wide satin band. My daughter wants me to make her some pillow cases that have the overlapped back cause she says the regular pillow cases just slide off. I might make her a couple of those overlapped back pillow cases but I think I'll just grab some needle and thread and sew on a few snaps and she can snap the pillowcases closed or I could do a velcro closure.

Here is the finished cover.


Here is a little fabric art card with sequins glued on.


I loooooooooove this fabric and today I need to buy the 3yds I have on hold for me. Guess that means I need to stop by the bank and add some money in there.


I'm so happy that I have another project done and out of the way. Now I just need to get to the other gazillion in the process projects and the other bazillion that bombard me on any given day. Tonight however, i'm making pillowcases. I might even think about laying out the pattern I made from my favorite shirt and do it in muslin to check the fitting and make sure the arm holes are correct. I did a half arse pinning of the pattern and the arm holes seemed a bit tight. I have 5 different fabrics, mostly cotton and a few knits to make from my new pattern. From the basic pattern I have 3 different variation idea's dancing around in my head. I'm going to go basic first so I can make sure I have the right ease in the shoulders and stuff. I hope it works out, it seems it will with just a few slight adjustments.

Wednesday, August 10, 2011

Making progress- Finishing projects

I'M DONE! Yes, I finished the apron, completely. I gave it a wash and dry and noticed that the flannel fabric enlarged itself. How does it get bigger instead of smaller? Oh well, I'm not going to fuss over it. I know my sewing skills stink but my defense is lack of consistent sewing over the years. I've had my sewing machine for about 15yrs and I've probably used it the equivalent of 1yr or less of consistant sewing. Shame on me, letting my sewing machine sit and be neglected which is probably why it doesn't want to sew a straight line. I really need to take my lovely in and have a tuneup.

So I finished the apron and here it is. close up of adjustable neck strap and the pockets in place. WOO! 1 project down a gazillion to go.


I started sewing on my sewing machine cover last night. I already had the pieces somewhat cut out. I made the rough pattern on graph paper then cut the pattern out from freezer paper. I then ironed the freezer paper to one side of my fabric sandwich and used it as a sewing guidline. I used a quilted fabric and a 2009 Brother Sister design studio fabric called Swirly floral or something like that. I probably should have used a stiff stabilizer to have it stand up better but I don't care, I like it just the way it is though I thought about sewing in a few cuts of lightweight boning to help it stand better. The floral fabric was a clearance fabric and I only found one person that had it when searching for some more of it. I love this fabric and I am by no means a very "FLORAL OR RETRO" person. I look at this fabric and it makes me happy, just like my sewing machine. I expect to have this finished tonight or no later than thursday. After I finish this project i'm gonna start on the kitty bed for my brood.

WIP/Sewing machine cover


I also played around, well i'm still dabbling with it, making a fabric embellished ATC (artist traiding card) with some of the scraps from the floral fabric. I want to make a bigger wall hanging of it for my sewing area but I only have a little bit left, maybe a 1/2 yard give or take some inches. I didn't get a picture of the card, not done yet.

Wednesday, March 10, 2010

Headband alteration

In the bellydance community, altered headbands are common. I like the creations a lot more than I do the dance. Don't get me wrong, I love the dance too but it's that creative process that piques my interest more. I finally got around to making an altered headband. The headband I used is wide, covered in a black satin type material. They are readily available in several colors, white, black, blue, orange, purple, red, silver and gunmetal(darker silver color).

This altered headband is actually 2 headbands. I also used some eyelet material as decoration. This is a pic of the headband before I added a few things to it.


This is the headband at the finished stage. I made it so that I could change out the flowers and feather accessories until I decided on a 100% or I may just leave it. I haven't decided yet. I added the afgani or it might be a kuchi pendant to the front, which also can be changed out. The way this headband is put together it opens up the potential for so many additional things.


Here is me wearing it.


I started on another altered headband, this one, that gunmetal color and a very pretty ribbon I got from Wal-mart and some swarovski crystals. I haven't decided yet if I want to alter it towards bellydance related or just altered enough for everyday type use. I haven't taken any pics yet because I haven't decided anything and I still need to clean up the ends of the ribbon and I keep forgetting. LOL!

Tuesday, February 16, 2010

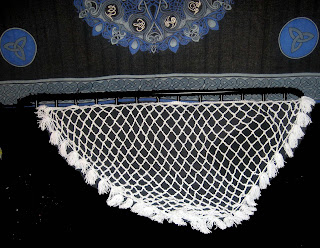
Crochet Shawl

I finished another crochet project, a shawl. I've wanted a triangular shawl for some time now but I always make excuses. I finally found, online, how to's and patterns using different methods but getting the same results, a triangular shawl. I printed a few, saved a few, 99, 100..LOL! I've had the " 1,2 skip a few.. 99, 100" thing stuck in my head for days now. Some of the patterns were not exactly what I was looking for but close. I wanted a more open style of shawl, almost netting like.

I found one pattern that was very very close to what I had in mind for my shawl but for some reason I just couldn't seem to wrap my head around the instructions and to top that off, the pics weren't that clear at all. I know I can read a pattern, I may not always understand some of the abbreviations or terms but I can find them and how to do them, no biggie, but sometimes it doesn't matter my brain just says
PFFT! I refuse to GET IT.
That can be very durn frustratin.

I've been working on this shawl for about a week or so. I didn't have to do to many rip outs (where you rip out the work you've already done), just a few. I thought I had all the math worked out but I ended up having to kinda make a few adjustments that made the shawl a wee bit off but nothing noticeable unless your really really looking for it. Despite the mistakes and the resulting size, I really like it. Atleast now I have a general idea for the next one, just need to get the materials out and adjust the pattern a bit. I didn't use a pattern per say, I read all the patterns I had and decided to use a foundation then the netting like design instead. I also added tassels to each connection point.

It's HUGE! It's almost as wide( roughly 3ft) at the top as my couch is long and if I don't have it stretched out, it's about 4-5ft long, but stretched out it shortens up some. To make it a bit neater I joined it to make it one solid edge instead of loops at every other row and in that process, miscalculated something and now the very end kinda has a hugging effect, which isn't bad, think it gives the piece a bit more character. I could have made the netting chains a few stitches less so the resulting netting effect would have been closer together and smaller. I'm sure this would have shortened the shawl but not eliminated the width any. I'd have to say the most tedious part was making the 30 something tassels to hang from it. I used Red Heart white yarn and a 10mm crochet hook and done in single crochet.



My next project is a LARGE granny square purse and after that or maybe during, fingerless gloves.

Monday, February 8, 2010

Something finished

I finished this little bag, playing around with a kniffty knitter ovalish loom. I wasn't to thrilled with the loom, I'll stick to the round ones. I also used my knitting nancy to make the drawstring.


Tuesday, February 2, 2010

Pics of custom requested beanie

Here is a pic of the hat I made for the person mentioned in previous post. Now I just have to get it in the mail and send it out. Punxsutawney Phil said we had 6 more weeks of winter so I have time.

Monday, January 25, 2010

Finished Crochet hat

I FINISHED! I'm very proud of this little hat.


Wednesday, December 23, 2009

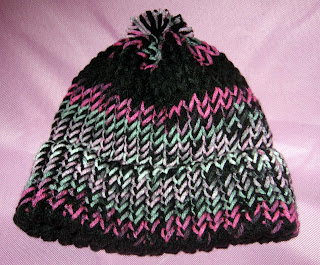
Finished hat 3

I'm almost finished, I just have to tack the brim down so it doesn't unroll and I'll be done with that tonight. So here are the pics. I added a little loose pom pom on top and I actually like it a little bit better now. I think the pom pom on top sets it off nicely.

Side view:


Top view:


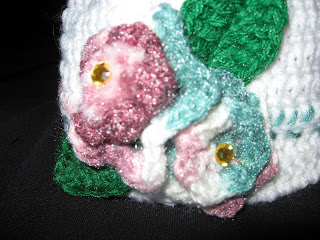
Close up:


I'm fixing to start on my skinny scarf now, YEAH!

Wednesday, November 4, 2009

Scarf Crazy

So I finished one scarf but not sharing pics cause it's a christmas present and if they saw it, they'd know it was for them. I don't want to spoil the surprise.

I have oddles of yarn, mostly the pain in the ass stuff to work with. I also have some red heart yarn that I've had for years. It's a lovely varigated color of purple and I bought it probably 10yrs or so ago and at that time only made a pair of slippers. I wanted to do a purple scarf and use the red heart yarn and came up with this.


It's definetly an interesting combination and I even added fringe. I was originally going to knit but the main purple boucle yarn (I think that's what it's called don't have the wrapper at the moment) didn't want to cooperate. I have a crochet hook that is a size 15.50mm, largest hook I have. I worked 2 strands of yarn in double crochet on this one. The only thing left to do on it, trim the fringe up.

After finishing up the varigated purple one, I was still on this purple kick. I have this extremely fuzzy fun fur stuff in purple with bits of silver reflections in it. I was going to pair it with a dark shade of purple chenille but it just wasn't working for me, the colors where way off. Instead, I paired this crazy furry yarn with 2 strands of thin black chenille instead. I had planned on knitting this as well but once again encountered the not wanting to cooperate syndrome. The yarn was way to fuzzy and kept catching and making it hard for the knots to slide. I figure, I'll crochet it with the big fat crochet hook. Worked out much better and atleast I can "see" with my fingers so I'd know where the next stitch went. I worked this one up in single crochet and added black chenille fringe to the end by pulling it through both corners of the ends of the scarf. I think my daughter will like it for it's fuzziness and that it's purple and black. It really is furry. The only thing left to do to this one is trim the fringe and lightly brush the fun fur up so it's even more furry.


This is the most creative I've been in a long time. I have other color schemes that I want to do. I've started now on #4 scarf using Chenille thick and quick prints with size 12.75mm (US 17)knitting needles. I normally use the 15mm (US 19)size knitting needles to make scarves with. I thought I'd try something different and a bit more challenging.